Benefiting from offline/online syncronisation technology, this feature will work offline all day and then sync the survey results when it gets a connection.
The purpose of this survey kiosk mode is to capture customer feedback on a few questions, capture their basic contact details and then to issue an optional voucher code so that can benefit from providing you with the information.
To set up your BlueBox ePOS as a kiosk follow these steps:
1) Set up a dedicated ePOS till and set the following settings:

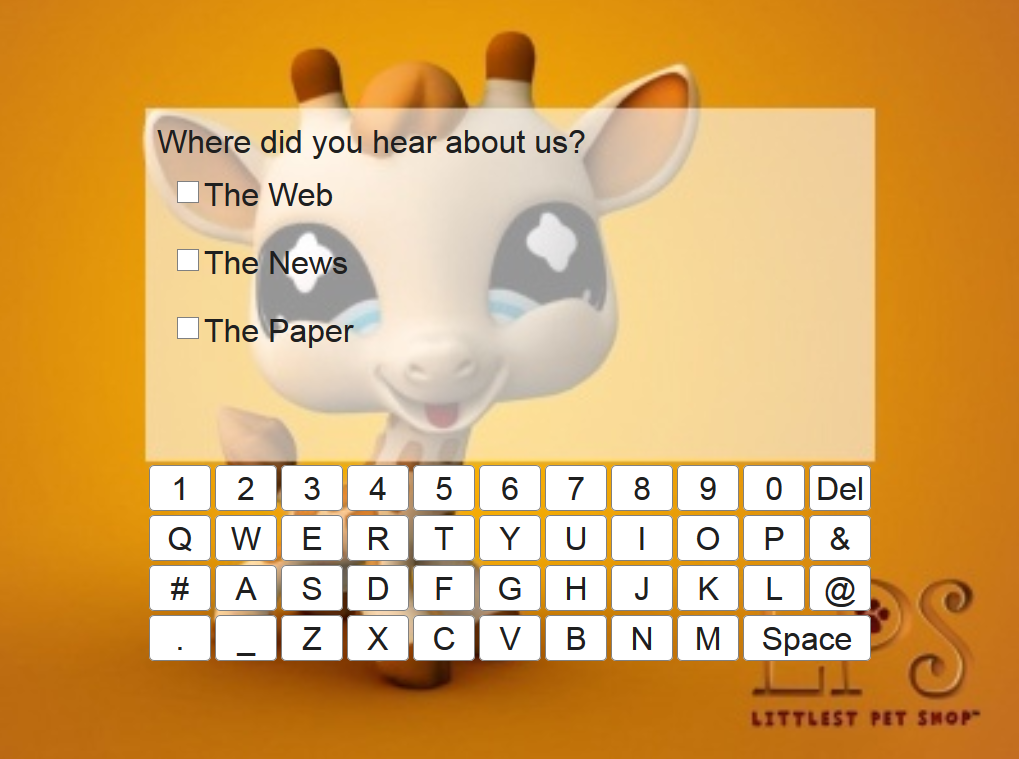
- Upload an image for the background (suggest 1024 x 768 px) - remember to leave a patch in the middle blank/tinted for the text to display on top of. A block 724px wide and 350px tall positioned at 150px left and 120px down from the top left corner, is optimal.
- Add your survey questions - these are formatted as follows:
This is a question?Answer One|Answer Two|Answer 3;
The question must end in a ? and the answers must be separated with |'s, finally end the question with a semicolon. - Add some 'end text' for the survey - this will display to the customer once they complete the survey.
- If you want the survey to send a text/sms message to the customer on completion enter the message you want sent. You can use the tag {vouchercode} if you want to include their unique discount voucher code in the message.
- If you want the survey to send an email message to the customer on completion enter the subject and email message you want sent. You can use the tag {vouchercode} if you want to include their unique discount voucher code in the message.


4) Open up the ePOS till and ensure that the latest till settings have been syncronised with the offline database. If you are unsure, click on extra > system > Delete Local Data and Refresh.


7) You can switch back to the 'main' ePOS screen by clicking on a hidden 'button' in the bottom right corner of the kiosk screen:


No comments:
Post a Comment