BlueBox ERP now includes a feature which allows you to updated the customer order number on debtor's invoices.
As expected from a formal ERP system, you cannot edit invoices - and as was recently raised by a customer, often the order number arrives after the invoice has been generated.
To update this info on the invoice simply edit the linked sales order and set the customer order number. Then view the debtor's invoice and click 'update values'. Where this function normally only updated the financial values on the document with relation to it's up line and down line documents, it now looks through the despatch note to the linked sales order, and if a customer order number exists will now stamp this on the invoice.
Friday, August 9, 2013


Thursday, August 8, 2013
BlueBox Web Stores with Responsive Design
Bluebox includes a nifty backoffice web-store publishing engine which allows you to split your inventory catalogue between different key customers and then give them access to their own private web ordering micro-site.
These micro-sites work out-the-box with BlueBox and are hosted on the same system/server as the backoffice system.
These sites are mobile-responsive, meaning that they re-shape themselves to fit mobile devices. They can also very easily be wrapped into mobile apps for all platforms, something we do via PhoneGap.
Each micro-site can have it's own web-address, or can be accessed via a unique key for security reasons. Alternatively you can place all your micro-sites on a front page menu and have your customers choose which site to access.
Link each site to a backoffice customer and you'll find that the system automatically creates the Sales Orders for you, handles the stock allocation and procurement and finishes off the process by despatching and invoicing the customer.
This accommodates 2 models - where the 'house account' pays for all the orders via our backoffice accounts system, or where the shopper pays via card at time of purchase. Using these 2 models we are able to provide the infrastructure for centralised headoffice ordering schemes where branches order their items individually but the bill is sent to headoffice, or where the bill is sent to the branch, or where the branch pays with a card at the time of purchase.
These micro-sites work out-the-box with BlueBox and are hosted on the same system/server as the backoffice system.
These sites are mobile-responsive, meaning that they re-shape themselves to fit mobile devices. They can also very easily be wrapped into mobile apps for all platforms, something we do via PhoneGap.
Each micro-site can have it's own web-address, or can be accessed via a unique key for security reasons. Alternatively you can place all your micro-sites on a front page menu and have your customers choose which site to access.
Link each site to a backoffice customer and you'll find that the system automatically creates the Sales Orders for you, handles the stock allocation and procurement and finishes off the process by despatching and invoicing the customer.
This accommodates 2 models - where the 'house account' pays for all the orders via our backoffice accounts system, or where the shopper pays via card at time of purchase. Using these 2 models we are able to provide the infrastructure for centralised headoffice ordering schemes where branches order their items individually but the bill is sent to headoffice, or where the bill is sent to the branch, or where the branch pays with a card at the time of purchase.
Friendly Naming for PDFs
BlueBox PDF's have always been named with the date/time stamp at the time of creation.
Today, happily, this has changed to incorporate the short-name of the document type, the customer company name and the document number. Much easier to read and recognise.
Today, happily, this has changed to incorporate the short-name of the document type, the customer company name and the document number. Much easier to read and recognise.
Tuesday, July 23, 2013
Supplier Pre-Defined Delivery Charges
In BlueBox each supplier is entered as a 'standard user' and then by adding them to the 'Creditors' user group they become enabled as a 'supplier' in the procurement module/s of the system.
Newly added fields in the bb_users table relating to suppliers and delivery charges are:
'delivery method' now with an additional field 'delivery method cost'
'delivery method two' also with its cost field 'delivery method two cost'
and finally 'free delivery over value'.
These new fields will help in defining the procurement relationship with the supplier, and the following rules apply to Purchase Orders only. Essentially what they are doing is determining if an automatic delivery charge should be applied to all PO's for this specific supplier. If either of the 'cost' values are entered, and a new PO is created with a corresponding delivery method, then the system will take that as an instruction to automatically add a delivery charge to the PO for the specified value (ex VAT).
If there is a 'free delivery over value' setting for that supplier, and the PO's grand total (inc VAT) is greater than the amount specified, then a zero-charge delivery item is added, indicating that there is no delivery to be charged for the order.
Lastly, if a delivery related item was added to the order manually, determined by the item_data name containing the words 'delivery', 'freight' or 'postage' then this process is skipped altogether, assumning that delivery has already been accounted for on the order.
Newly added fields in the bb_users table relating to suppliers and delivery charges are:
'delivery method' now with an additional field 'delivery method cost'
'delivery method two' also with its cost field 'delivery method two cost'
and finally 'free delivery over value'.
These new fields will help in defining the procurement relationship with the supplier, and the following rules apply to Purchase Orders only. Essentially what they are doing is determining if an automatic delivery charge should be applied to all PO's for this specific supplier. If either of the 'cost' values are entered, and a new PO is created with a corresponding delivery method, then the system will take that as an instruction to automatically add a delivery charge to the PO for the specified value (ex VAT).
If there is a 'free delivery over value' setting for that supplier, and the PO's grand total (inc VAT) is greater than the amount specified, then a zero-charge delivery item is added, indicating that there is no delivery to be charged for the order.
Lastly, if a delivery related item was added to the order manually, determined by the item_data name containing the words 'delivery', 'freight' or 'postage' then this process is skipped altogether, assumning that delivery has already been accounted for on the order.
Tuesday, July 9, 2013
New Ajax Lookup Feature for Creditor Invoice Numbers
Similar to the previous post, BlueBox now includes a Creditors Invoice Number validator which checks to see if the number entered has been used for that creditor previously.
 If no supplier/creditor is entered in the form then this feature will not run. If one has been entere it will verify the uniqueness of the number entered and come back with a positive or negative message.

New Ajax Lookup Feature for SKU Codes
Maintaining a unique alphanumeric SKU code sequence is a bit of a pain. BlueBox now includes an automated alphanumeric SKU sequencer:
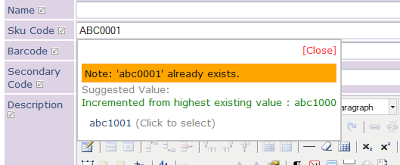 This new feature appears in the bb_item_data and bb_item_data_options menu.
It checks the sequence you have entered and strips out the numeric portion, looking for the next highest number to suggest. If no numbers exist for that alpha-prefix then it starts at 0001.
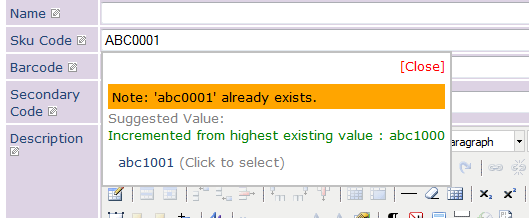
It checks the sequence you have entered and strips out the numeric portion, looking for the next highest number to suggest. If no numbers exist for that alpha-prefix then it starts at 0001.
Sunday, June 23, 2013
Setting up your BlueBox2.0 ePOS as a Customer Survey Kiosk
BlueBox ePOS terminals have a setting called Kiosk-mode which allows a touch-screen PC to be set up as a customer survey kiosk with touch screen keyboard.
Benefiting from offline/online syncronisation technology, this feature will work offline all day and then sync the survey results when it gets a connection.
The purpose of this survey kiosk mode is to capture customer feedback on a few questions, capture their basic contact details and then to issue an optional voucher code so that can benefit from providing you with the information.
To set up your BlueBox ePOS as a kiosk follow these steps:
1) Set up a dedicated ePOS till and set the following settings:
4) Open up the ePOS till and ensure that the latest till settings have been syncronised with the offline database. If you are unsure, click on extra > system > Delete Local Data and Refresh.
7) You can switch back to the 'main' ePOS screen by clicking on a hidden 'button' in the bottom right corner of the kiosk screen:
Benefiting from offline/online syncronisation technology, this feature will work offline all day and then sync the survey results when it gets a connection.
The purpose of this survey kiosk mode is to capture customer feedback on a few questions, capture their basic contact details and then to issue an optional voucher code so that can benefit from providing you with the information.
To set up your BlueBox ePOS as a kiosk follow these steps:
1) Set up a dedicated ePOS till and set the following settings:

- Upload an image for the background (suggest 1024 x 768 px) - remember to leave a patch in the middle blank/tinted for the text to display on top of. A block 724px wide and 350px tall positioned at 150px left and 120px down from the top left corner, is optimal.
- Add your survey questions - these are formatted as follows:
This is a question?Answer One|Answer Two|Answer 3;
The question must end in a ? and the answers must be separated with |'s, finally end the question with a semicolon. - Add some 'end text' for the survey - this will display to the customer once they complete the survey.
- If you want the survey to send a text/sms message to the customer on completion enter the message you want sent. You can use the tag {vouchercode} if you want to include their unique discount voucher code in the message.
- If you want the survey to send an email message to the customer on completion enter the subject and email message you want sent. You can use the tag {vouchercode} if you want to include their unique discount voucher code in the message.


4) Open up the ePOS till and ensure that the latest till settings have been syncronised with the offline database. If you are unsure, click on extra > system > Delete Local Data and Refresh.

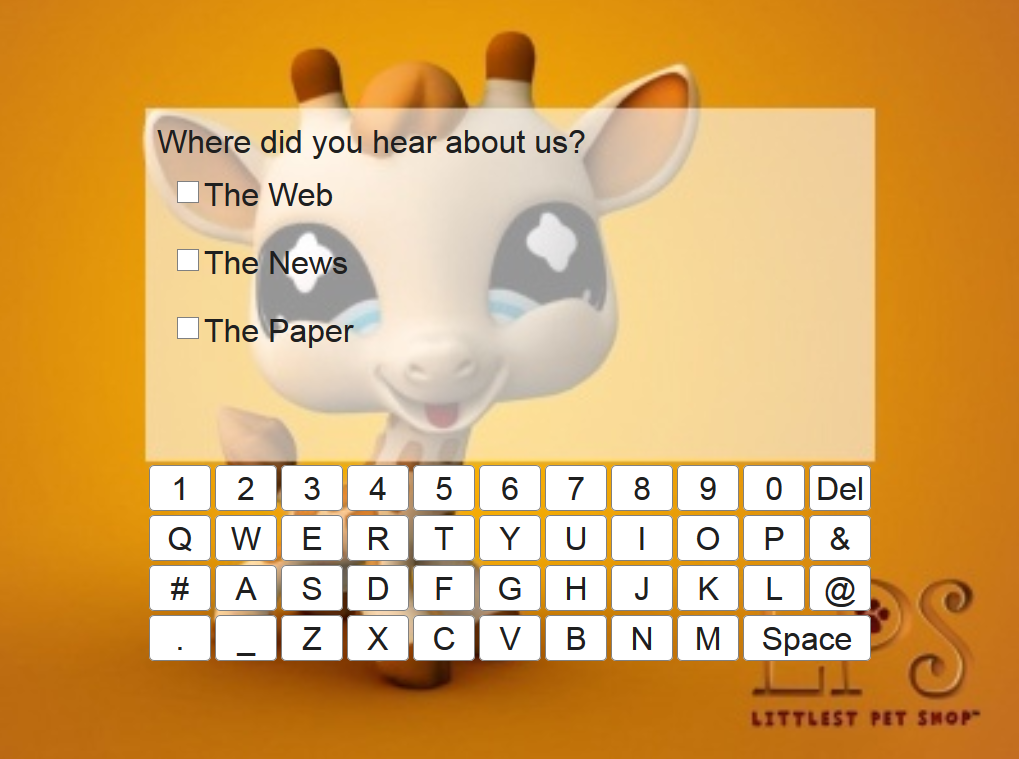


7) You can switch back to the 'main' ePOS screen by clicking on a hidden 'button' in the bottom right corner of the kiosk screen:


Subscribe to:
Posts (Atom)